
Thanks Platform Setup
The Platform Setup section allows the admin to configure the recognition platform according to their business needs. It enables to customize the platform settings in the most optimal way.
This section enables configuring the organization’s details, such as company domain name, currency type, organization logo, and redemption countries.
Allows configuring platform banner, background color scheme, and application text color.
Allows configuring the reward and recognition program name and mask email.
Allows feature configurations that are provided by the platform.
Organization Details
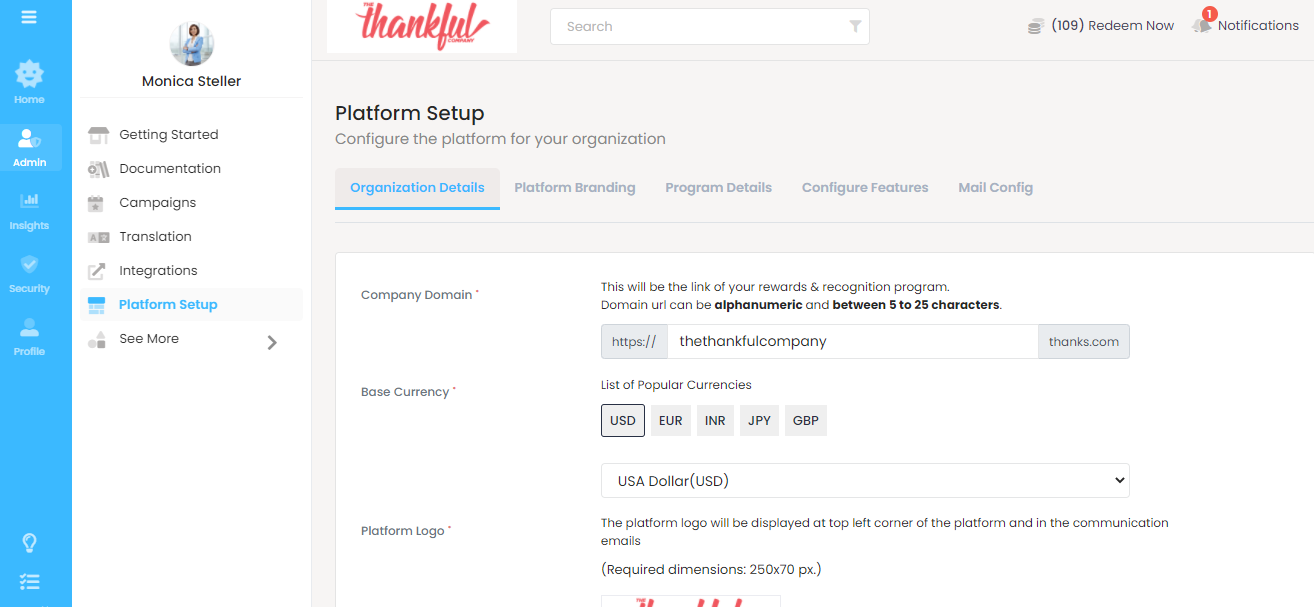
Organization Details tab allows the administrator to add the platform subdomain URL, select the base currency, upload the platform logo, and map the countries for redemption.
Follow the steps below to customize the organization details:
- Log in to the platform, click on the Admin icon in the left menu bar, and select Platform Setup.
- Set up the URL for your recognition platform by entering the subdomain.
Note: The Subdomain name length must be between 5 to 25 characters and can be alphanumeric.
- Set the base currency by selecting one of the currencies from the drop-down list.
- Upload your company logo in the Platform Logo section. This logo will appear on the top left corner of the platform screen and in the communication emails sent from the platform.
- In the last section, choose the countries you would want to map to your redemption catalog.
Platform Branding
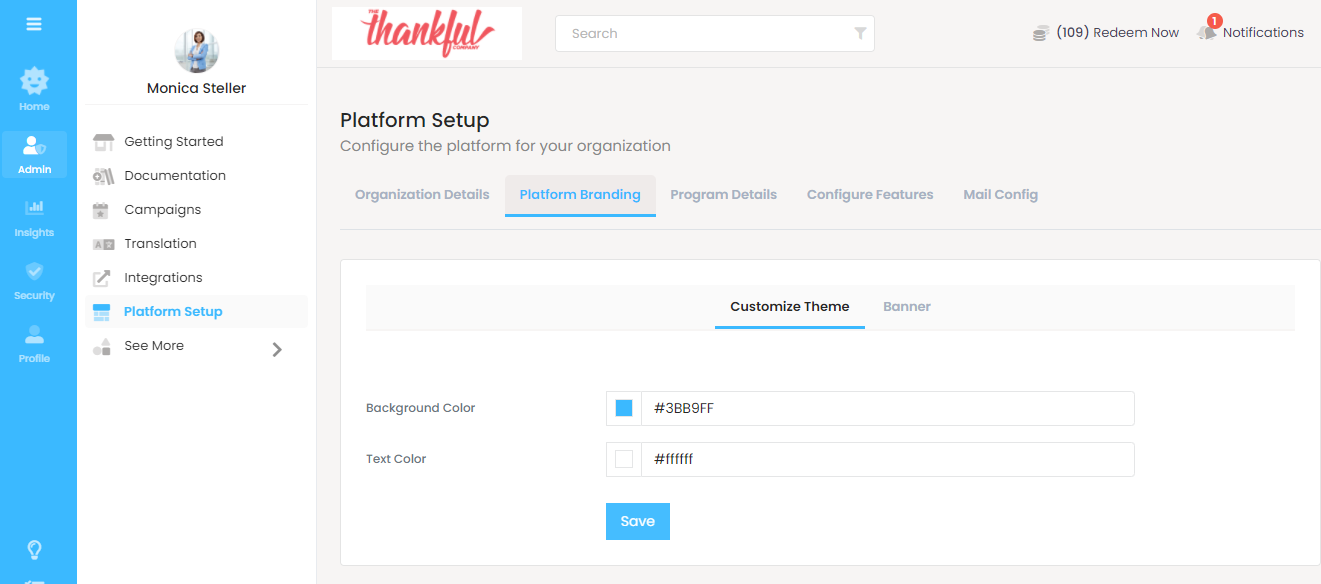
The Platform Branding tab enables the administrator to configure the look and feel of the platform. The admin can customize elements like text color, background theme, and platform banners according to their business needs.
Follow the steps below to customize platform branding:
- Log in to the platform, click on the Admin icon in the left menu bar.
- Go to Platform Setup and select the Platform Branding tab.
- In the Background Color and Text Color fields, enter the respective Hexacolor code.
To select a color visually, refer to the below steps:
- Click on the color square box.
- Drag the color slider to get in the range of the color of your choice. Note: In the Color Values section, the numeric values will change according to the selected color. For example, RGB values are based on brightness levels, from 0 to 255, with 0 being black and 255 being pure or white.
- Click the Save button.
4.Go to the Banner tab and hover the mouse cursor on the banner of your choice. Click on the Activate icon to activate the banner. Once activated, the banner will appear on the homepage of the platform.
To redirect the banner to an internal feature or external link:
- Hover the mouse cursor on the banner and click on the update icon.
- Enable the redirect option and select the feature from the drop-down list you want the banner to redirect to.
- In case of redirection to an external link, select the checkbox and enter the link.
- To add a new banner, click on the Add Banner button in the banner tab.
6.Enter the Banner name and upload the banner image.
Note: Please check the exact banner dimensions and the size of the
image before uploading. The image can be in the .png .jpg .jpeg or .gif format.
7.Enable redirection if needed. Click the Add Banner button.
Program Details
The Program Details tab allows the administrator to configure the initiative name in the platform and set up an email mask for emailstriggered to your employees by the platform.
Follow the below steps to configure the program details:
- Log in to the platform and click on the Admin icon in the left menu bar.
- Go to Platform Setup and select the Program Details tab.
- In the Initiative Name field, enter the name of your recognition program. Note: The name of the program must be less than 50 characters.
- In the Email Mask field, enter the email mask for emails triggered by the platform.

Configure Features
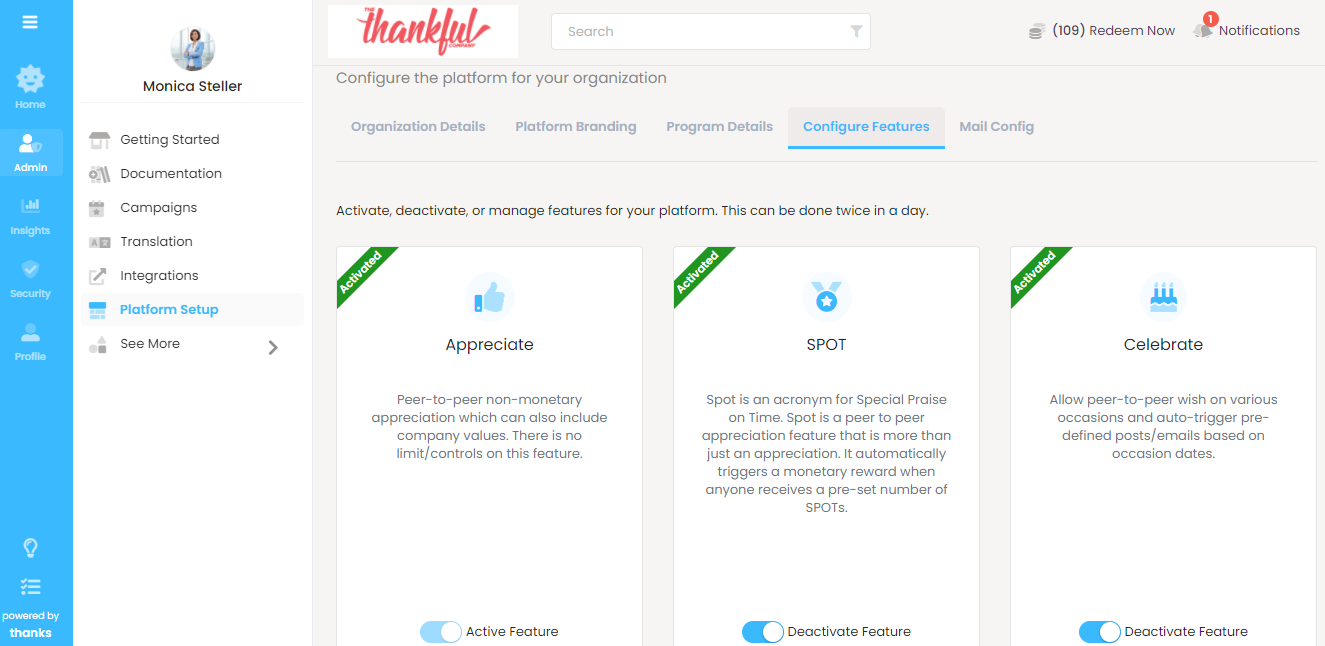
The Configure Features tab enables the admin to activate, deactivate, and manage the features on the platform.
Follow the below steps to configure the program details:
- Log in to the platform and click on the Admin icon in the left menu bar.
- Go to Platform Setup and select the Configure Features
A list of all the available platform features appears. The Administrator can activate or deactivate a feature by sliding the button. To configure a particular feature, click on Manage.
Mail Configuration
The users receive nudge emails from the system to ensure optimum utilization of the recognition platform. Reminder emails about wishing colleagues on special occasions, budget utilization, pending approvals, etc., are sent to the users.
The Thanks admin determines the frequency at which these reminder emails need to be triggered.
Follow the steps below to configure the email frequency:
- Login to the Thanks application.
- Click on the Admin icon in the left menu bar of the homepage.
- Click on Platform Setup and select the Mail Config tab.
The page will comprise the list of reminder emails. Admin can choose the frequency at which each of these emails should be triggered. If the admin wishes not to trigger any of these emails, they can set the frequency to Never.
